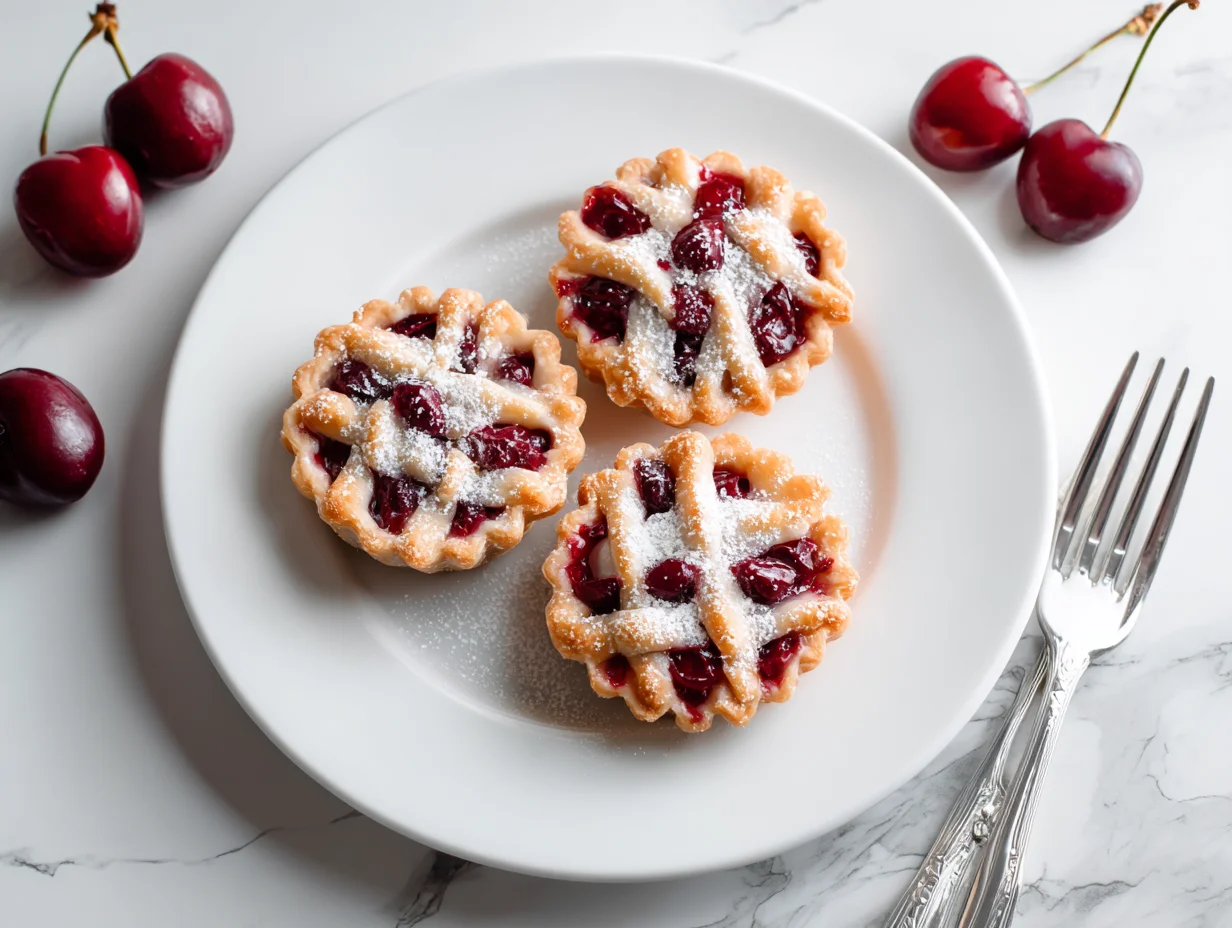
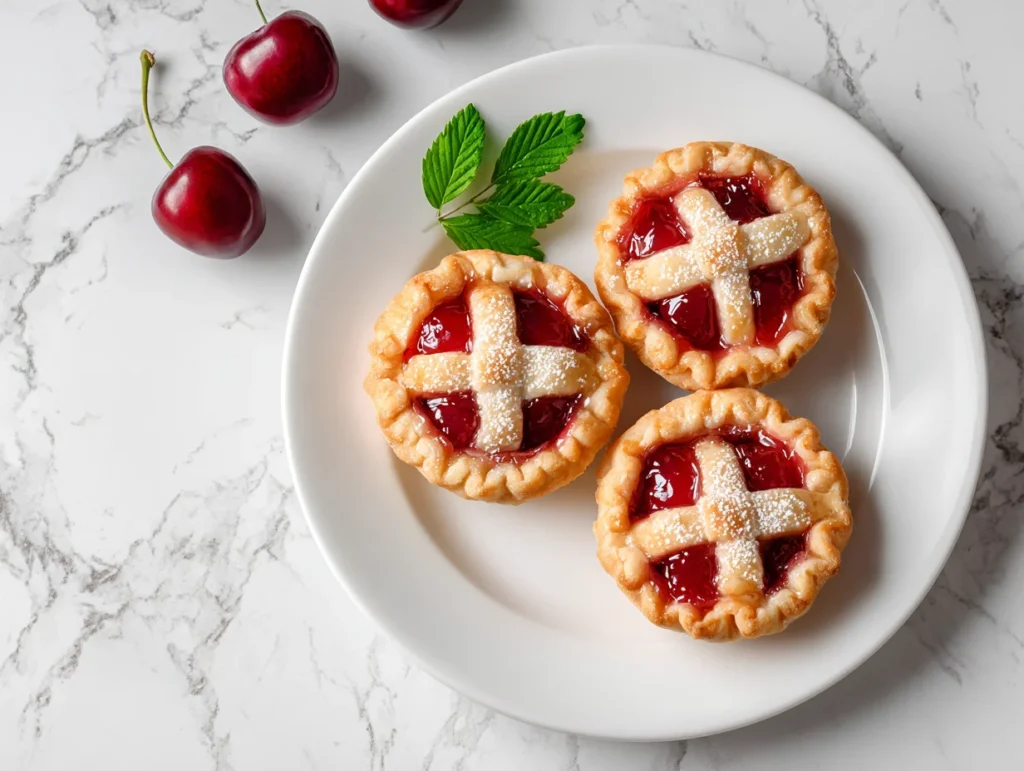
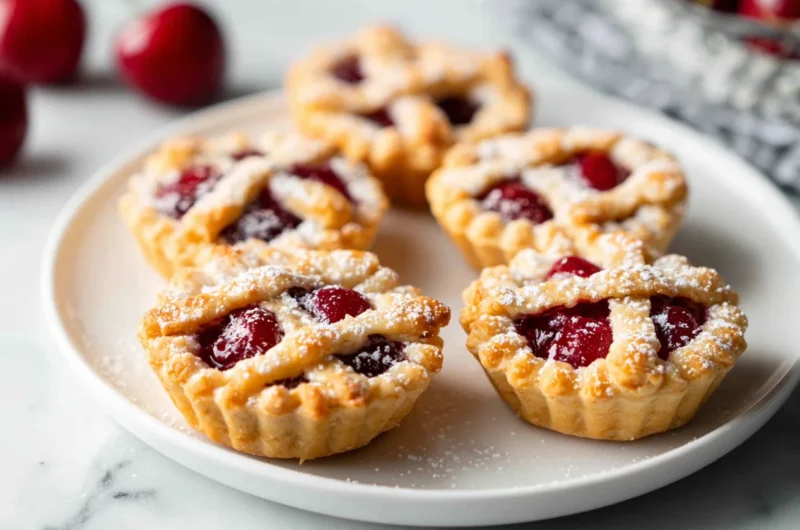
Mini Cherry Pies Recipe
There is something undeniably charming about mini cherry pies, the perfect balance of buttery pastry and sweet, slightly tart cherry filling packed into a bite-sized dessert. These little pies are not just desserts; they are handcrafted moments of indulgence that bring bakery-level elegance straight into your kitchen.
What makes them truly special is their simplicity combined with precision. With just a few ingredients, you can create a dessert that feels both rustic and refined. The flaky crust, when baked correctly, crumbles delicately while holding a rich, glossy cherry filling that bursts with flavor in every bite.
As an expert chef, I focus on control of texture and balance of sweetness. This recipe is designed to guide you toward consistent, professional results so your mini cherry pies come out perfectly golden, evenly baked, and irresistibly delicious every single time.
👉 If you love bite-sized desserts, try Easy Mini Cheesecakes Recipe.
Filling Separation and Crust Sogginess Error
One of the most common mistakes when making mini cherry pies is ignoring moisture control in the filling. Many bakers use cherry filling that is too watery or do not properly thicken it before baking. This excess liquid seeps into the crust, making it soggy and preventing it from achieving a crisp, golden texture.
Another issue is overfilling the pastry cups. When too much filling is added, it bubbles over during baking, breaking the structure of the crust. This not only affects appearance but also ruins the delicate balance between pastry and fruit.
Improper sealing of the pie edges is also a frequent problem. If the edges are not pressed firmly or crimped correctly, the filling leaks out, leading to uneven baking and burnt edges around the tray.
Lastly, baking at inconsistent temperatures can worsen all these issues, as uneven heat prevents proper crust development while leaving excess moisture trapped inside the pie.
Professional Method for Perfect Filling Balance
To avoid soggy pies, always ensure your cherry filling is properly thickened before use. If using canned filling, reduce excess syrup or cook it briefly to improve consistency. This prevents unnecessary moisture from entering the crust.
Measure filling carefully and avoid overstuffing each mini pie. A controlled amount ensures even baking and prevents overflow, keeping both structure and appearance intact throughout the process.
Always seal the edges firmly using a fork or crimping method. This helps lock in the filling and ensures a clean bake without leakage or burning around the edges.
Finally, maintain a steady baking temperature. Consistent heat allows the crust to crisp properly while the filling sets beautifully, delivering bakery-quality mini cherry pies every time.
Ingredients You’ll Need

Base Ingredients:
- All-purpose flour
- Unsalted butter (cold, cubed)
- Sugar
- Salt
- Egg
- Cold water
- Cherry pie filling
Optional Add-ins:
- Vanilla extract
- Lemon zest
- Cinnamon powder
- Almond extract
- Powdered sugar for dusting
Step-by-Step Instructions
Step 1: Prepare the Pie Dough
Begin by mixing flour, sugar, and salt in a bowl. Add cold butter and rub it into the flour until the mixture resembles coarse crumbs. Slowly add cold water and form a soft dough. Do not overwork it, as this will affect flakiness. Wrap and chill the dough for proper texture development.
This step ensures a buttery, flaky crust that holds structure while baking. Proper chilling is essential for professional results and prevents shrinkage during baking.
👉 For a fruity cookie twist, check out Blueberry Cheesecake Swirl Cookies.
Step 2: Roll and Shape the Dough
Roll out the chilled dough on a lightly floured surface and cut into small circles. Gently press them into a greased mini muffin tray. Ensure even thickness to promote uniform baking.
This shaping process is crucial for consistent texture and appearance. Properly formed shells ensure the filling sits evenly and bakes without overflow.
Step 3: Prepare the Cherry Filling
If needed, thicken the cherry filling slightly by simmering it until excess liquid reduces. Allow it to cool before using. This step helps control moisture inside the pies.
Balanced filling ensures the crust remains crisp while delivering rich cherry flavor in every bite. Avoid using overly runny filling for best results.
Step 4: Fill the Pie Shells
Carefully spoon the cherry filling into each dough-lined cup. Do not overfill; leave space for bubbling during baking. This prevents leakage and maintains structure.
Even filling distribution ensures uniform baking and consistent presentation. Precision at this stage defines the final quality of the pies.
Step 5: Bake Until Golden
Bake in a preheated oven until the crust turns golden brown and the filling is bubbling gently. Keep an eye on color development for perfect doneness.
Proper baking ensures crisp edges and a perfectly set filling, creating a balanced texture between pastry and fruit.
Step 6: Cool and Serve
Allow the mini pies to cool slightly before removing from the tray. This helps them set properly and prevents breaking.
Cooling enhances structure and allows flavors to settle, resulting in a clean, professional finish.
Cook Time
Total: 45 minutes
Prep: 25 minutes
Bake: 20 minutes
Servings
These mini cherry pies are perfect for gatherings, offering individual portions that are easy to serve and enjoy. Their size makes them ideal for parties, tea-time spreads, or dessert platters.
Each serving delivers a balanced combination of buttery crust and sweet cherry filling, ensuring a satisfying dessert experience without being overly heavy.
This recipe typically yields a generous batch, making it suitable for sharing or storing for later enjoyment.
Makes approximately 12–14 mini pies
Nutritional Information (approx. per serving)
- Calories: 180–220 kcal
- Carbohydrates: 28g
- Fat: 8g
- Sugar: 12g
- Protein: 2g
- Fiber: 1g
Mini cherry pies provide a sweet energy boost while offering a balance of carbohydrates and fats. The cherries contribute natural fruit flavor and slight antioxidant value.
The butter-based crust adds richness and texture, making each bite satisfying and indulgent in moderation.
When enjoyed responsibly, these pies serve as a delightful dessert option that combines comfort with flavor satisfaction.
👉 For another small, indulgent treat, see Soft Tiramisu Cookies.
Storage Instructions
Allow mini cherry pies to cool completely before storing to prevent moisture buildup inside the container.
Store them in an airtight container at room temperature for up to two days to maintain freshness.
For longer storage, refrigerate the pies. This helps preserve both filling and crust integrity.
Reheat briefly in an oven before serving to restore crispness and enhance flavor.
Suggestions
Use high-quality cherry filling for the best flavor outcome, as it directly impacts the final taste of the pies.
Chill the dough properly to achieve a flaky, bakery-style crust with crisp edges and soft layers.
Dust with powdered sugar after baking for a refined presentation and added sweetness.
Serve warm with whipped cream or vanilla ice cream to elevate the dessert experience.
Seasonal Relevance
Mini cherry pies are especially popular during cherry season when fresh fruit is abundant and naturally flavorful.
They are also perfect for festive occasions such as holidays and family gatherings, adding charm to dessert tables.
In colder months, they provide a comforting baked dessert that pairs beautifully with warm drinks.
Their versatility makes them suitable for year-round enjoyment, adapting easily to seasonal ingredients.
Finl Words
Mini cherry pies represent the beauty of simple baking done with precision and care.
Every step, from dough preparation to baking, plays a vital role in achieving perfect results.
With practice, this recipe becomes an easy yet impressive dessert option for any occasion.
These pies are more than treats—they are a celebration of classic baking techniques and flavor harmony.
Mini cherry pies are buttery, flaky, and filled with sweet-tart cherry filling baked to perfection. These bite-sized desserts are easy to make, beautifully golden, and perfect for parties, gatherings, or a delightful homemade sweet treat anytime.
👉 If you enjoy chocolatey desserts, explore Browned Butter Brookies.
Mini Mini Cherry Pies Recipe
12
servings25
minutes20
minutes180
kcalMini cherry pies are buttery, flaky, and filled with sweet-tart cherry filling baked to perfection. These bite-sized desserts are easy to make, beautifully golden, and perfect for parties, gatherings, or a delightful homemade sweet treat anytime.
👉 For a festive holiday-inspired sweet, try Christmas Cherry Cheesecake Bars.
Ingredients
2 cups all-purpose flour
1 cup cold unsalted butter (cubed)
2–3 tbsp sugar
1/2 tsp salt
1 egg
3–4 tbsp cold water
1 1/2 cups cherry pie filling
Optional: vanilla extract, lemon zest, cinnamon powder, powdered sugar
Directions
- Mix flour, sugar, and salt, then cut in cold butter until crumbly.
- Add egg and cold water to form dough; chill for 20 minutes.
- Roll dough and cut into small circles, place in mini muffin tray.
- Fill with cherry filling without overfilling.
- Bake until golden brown and bubbling.
- Cool slightly before removing and serving.
Recipe Video
Notes
- Always keep butter and dough cold for flaky crust.
- Do not overfill to avoid leakage.
- Thicken cherry filling if it is too runny.
- Cool before removing to maintain shape.
Frequently Asked Questions
Can I use fresh cherries instead of pie filling?
Yes, fresh cherries can be used, but they must be cooked with sugar and thickener first. This ensures the filling has the right consistency and does not release excess liquid during baking, which could make the crust soggy or affect texture.
How do I prevent my pie crust from shrinking?
Always chill the dough before baking and avoid stretching it while placing it in molds. Proper resting allows gluten to relax, helping the crust maintain its shape and size during baking without shrinking or pulling away from the edges.
Can I freeze mini cherry pies after baking?
Yes, fully baked pies can be frozen once cooled. Store them in airtight containers or freezer bags. When ready to eat, reheat in an oven to restore crispness and refresh the texture without losing flavor quality.